Complete Guide to Itinerary Builder for Travel Agents
TripMatrix is an all-in-one itinerary builder solution for travel agents, tour operators, and DMCs.
Among many benefits, itinerary builder for travel agents can increase your sales, reduce operational costs, and boost your productivity.
Explore our complete guide to TripMatrix travel itinerary builder software and understand its features and possibilities for your travel business.
We’ve covered how to create destinations, build a supplier list, add products, manage trip offers, and much more.
Step 1: Creating Destinations
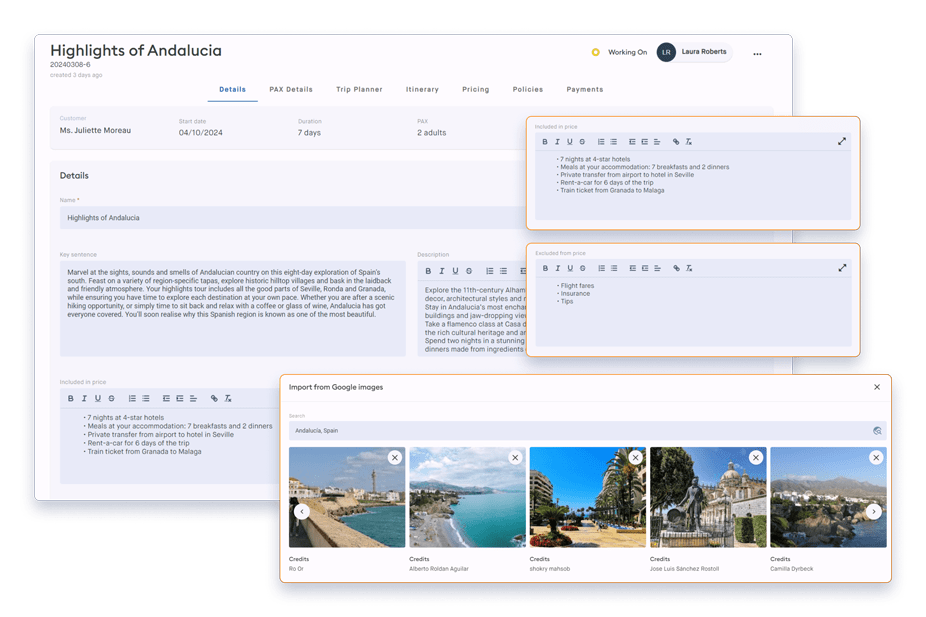
Make your travel agent itinerary builder more engaging by adding visual appeal to each destination.
Personalize the experience by uploading your own photos or importing images directly from the integrated Google Search option.
You can even remove any photographs you don’t like, ensuring each destination looks exactly how you envision it.
For added functionality, connect each destination to its exact location using Google Maps. This makes navigation effortless and provides travelers with precise details about their journey.
Additionally, enrich the experience by adding more details and interesting facts about each destination. Highlight unique features, cultural insights, or travel tips to make the itinerary both informative and appealing.
Destination
Step 2: Building a Supplier List
Once you’ve created destinations in the itinerary builder, it’s time to build a supplier list. TripMatrix offers a dedicated supplier section to simplify this process.
Start by creating a list of your suppliers and filling in their details. You can include essential information such as their address, main contacts, and additional contact details, ensuring all key data is readily accessible.
For convenience, you can enable an automatic booking confirmation email. This feature sends an email to the supplier every time a booking is made for their products, saving time and reducing manual work.
TripMatrix also allows you to define cancellation and payment policies for each supplier. These policies are automatically applied to all products associated with the supplier, ensuring consistency and clarity across your offerings.
Step 3: Adding Products
Within the travel itinerary builder, you can easily access and manage your product inventory. Start by selecting a product type: accommodation, experience, or transportation.
Enter the product name and connect it to previously added suppliers using a convenient dropdown menu. For products not linked to a supplier, your contact information will automatically be assigned.
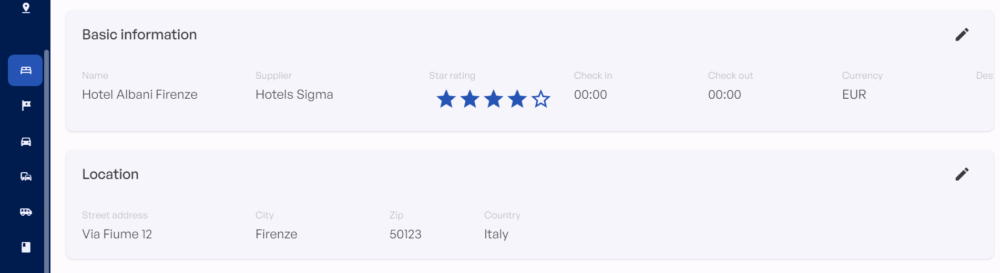
When adding accommodations, be sure to include key details like check-in and check-out times. You can also specify the hotel’s star rating, associate it with previously created destinations, and generate exact locations using Google Maps feature.
Utilize hotel entries further by adding guest information and defining cancellation policies, ensuring your offerings are comprehensive and informative.
All product details are fully editable, so you can make updates or adjustments whenever needed, keeping your inventory accurate and up to date.
Hotel information
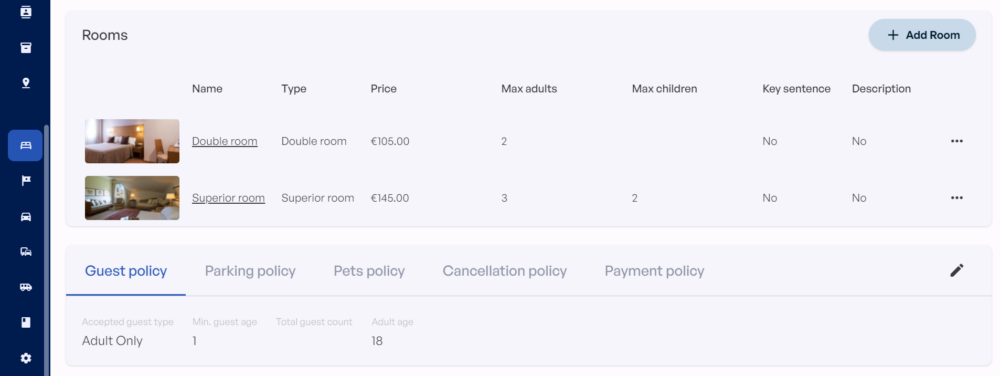
After finalizing the details for a hotel, you can enter specific information for each room separately.
For every room, include details such as the room type, price list, photos, description, and occupancy. This ensures that each room is accurately represented and easily accessible for bookings.
Products in the experience category function similarly to accommodations. You can attach vital information to each experience, including location, prices, photographs, and cancellation policies.
This organized approach allows you to provide comprehensive and detailed information for both accommodations and experiences, enhancing the overall user experience.
Room Type
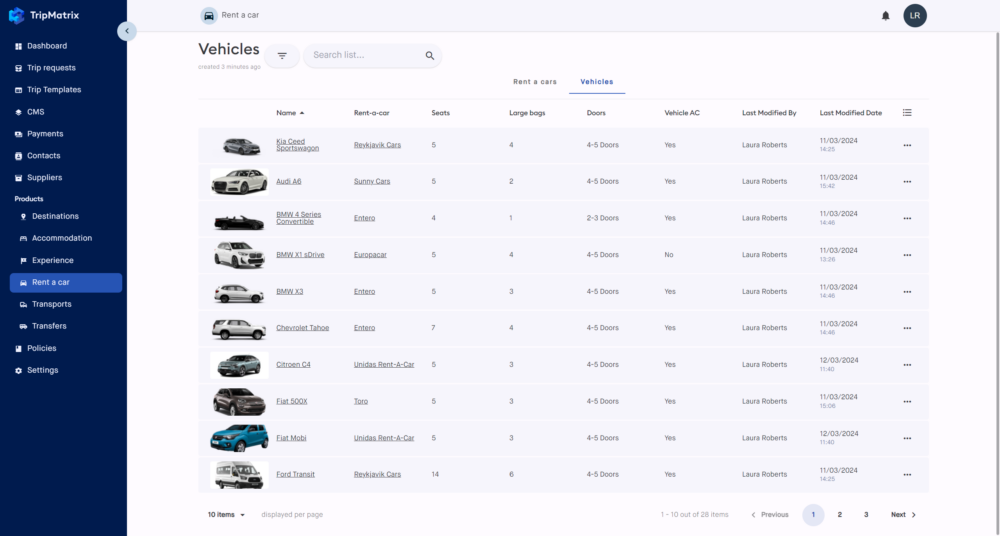
In the rent-a-car category, you can list the types of vehicles available from your suppliers. This allows for easy management and seamless integration into trips.
Complete the details for each vehicle, including car brands, luggage capacity, number of seats, and number of doors. Providing accurate information helps travelers choose the vehicle that best fits their needs.
Additionally, make sure to add specific locations for each car. This feature ensures an easy and efficient search process when creating a trip itinerary.
Step 4: Managing Trip Requests
When a customer contacts you via phone or email, start by creating a trip request.
Add essential details, such as the name of the trip and the traveler, along with any notes on their preferences. This ensures that their needs and expectations are well-documented.
For existing customers, their name will appear in a convenient dropdown menu, making the process faster and more efficient.
If the trip request is submitted through your TripMatrix website, it will automatically be added to the travel itinerary builder, saving time and ensuring seamless integration.
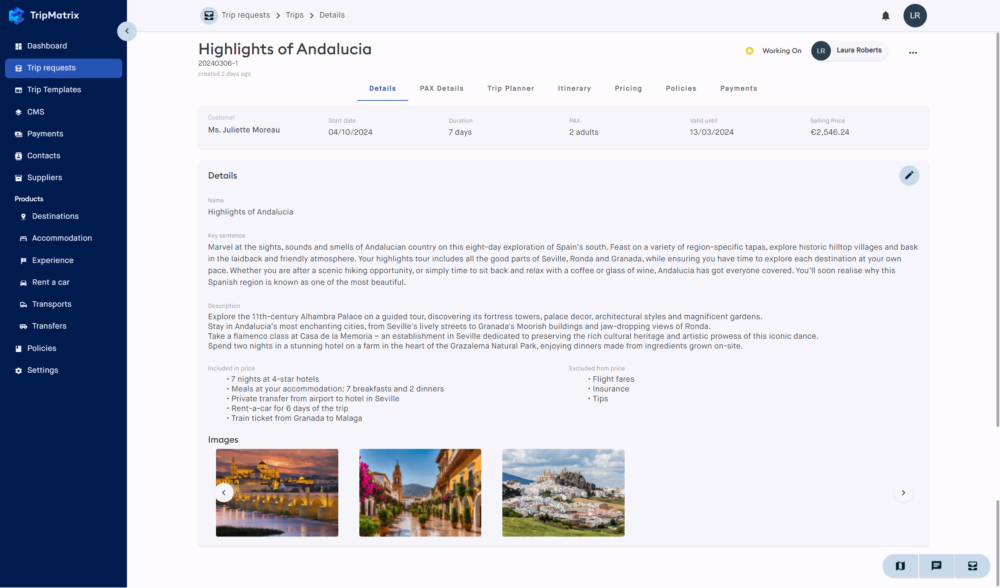
Step 5: Creating a Trip
Once you’ve added a trip request, the next step is to create the trip. You can either start fresh with a new trip or copy an existing one from the itinerary builder software.
By selecting “New Trip,” you’ll be prompted to choose a currency, specify the number of travelers, and set a trip start date. Additionally, in the “Pax Details” tab, you can input the number of passengers and their personal information for better organization.
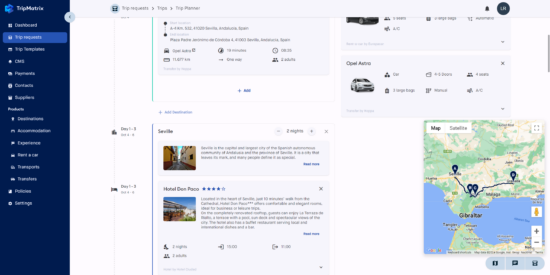
After completing the passenger details, move on to the “Trip Planner” tab to start building the trip. Begin by adding existing or new destinations to your itinerary.
In the “Trip Planner” tab, you can connect different destinations to specific days of the trip, creating a detailed and organized plan for each traveler using the TripMatrix travel agent itinerary builder.
Create new trip
After organizing destinations by days, the next step is to add products to the itinerary.
Start by selecting hotel options and assigning rooms for each passenger.
You can choose from internal hotels provided by your suppliers or external hotels with real-time availability and pricing, ensuring flexibility and convenience.
Next, connect experiences from your product inventory to the trip.
Details such as duration, start time, and tour specifics can be added and edited later, allowing for customizations based on traveler preferences.
Finally, complete the products section by including transportation options.
For car rentals, simply search through available car options by entering a destination, making it easy to match vehicles to the trip’s requirements. See below how transportation options looks inside TripMatrix.
Rent-a-car options
Ensure that all the information in the “Trip Planner” tab is up to date. Once everything is complete, all the details from the “Trip Planner” will automatically transfer to the “Itinerary” tab.
Next, move to the “Itinerary” tab to add any final details for each day of the trip. This is where you can fine-tune the itinerary and ensure everything is in place.
Lastly, review and adjust all the prices in the “Pricing” tab to ensure accuracy. This step allows you to confirm that the trip pricing aligns with the planned products and services.

Step 6: Offer Creation and Payment Processing
Once you’ve created a trip in the itinerary builder, it’s time to send an offer to your client. Simply click on the “Send Offer” button and select the payment due date.
After the offer is sent, customers can log in to the TripMatrix Traveler Portal to review the trip details. If modifications are needed, any updates made by the travel agent will be visible in real-time.
When the customer confirms that everything is in order, they will add their personal information, view a trip summary, and accept the offer.
As the travel agent, once the customer accepts the offer, you’ll have the option to review and adjust the trip details again if necessary.
Flexible Payment Options
TripMatrix itinerary builder software offers flexible payment options. You can choose from wire transfers, Stripe payments, or external payment methods.
After considering the payment options and ensuring all information is updated, it’s time for the customer to make their payment.
Booking and Payment Finalization
Once the customer has reviewed everything, the “Accept Offer” button changes to a “Book Now” option. When they click this button, they will be able to finalize their payment.
After the customer’s payment is confirmed, the travel agent will mark all products from the trip as booked. This step grants access to all customer vouchers.
Vouchers and Documentation
Travelers can download all their vouchers and travel documentation. If they wish to print the documentation, they can easily download it in PDF format, without any additional formatting required.
Other Useful Features in the Itinerary Builder for Travel Agents
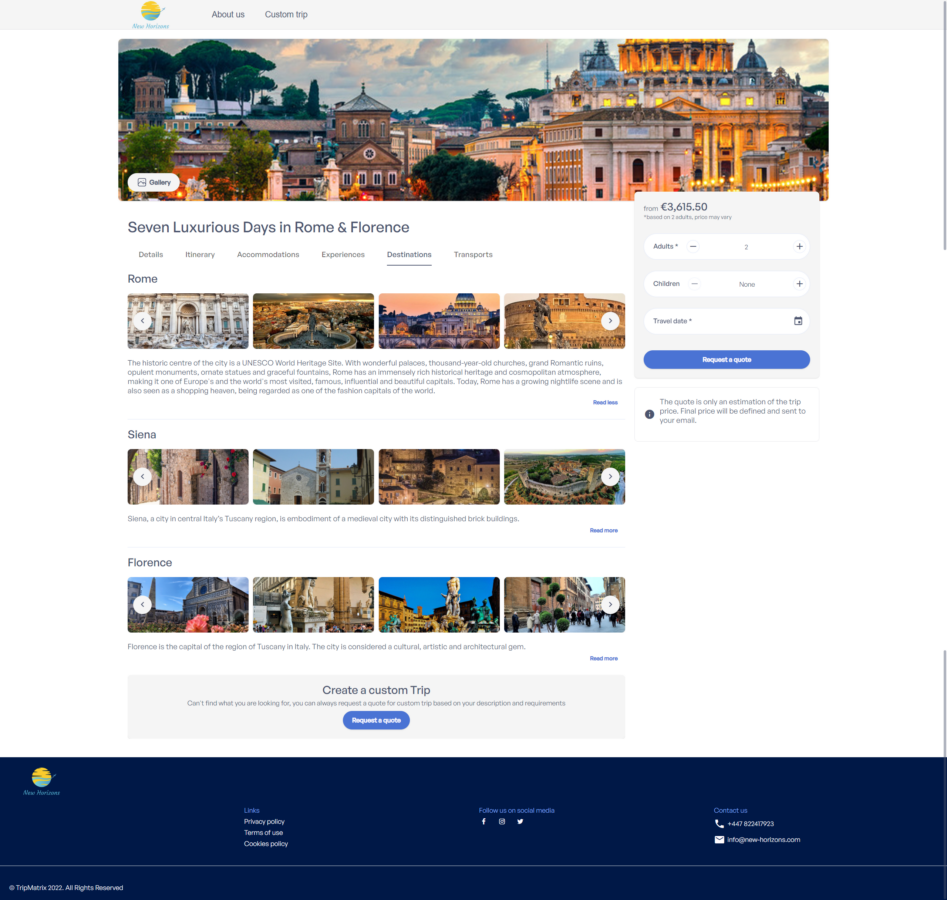
One of the benefits of using TripMatrix for travel agents is the customizable website that functions as a web booking engine. Best of all, this feature comes at no extra cost.
With your own website, you can showcase your trip packages, making it easy for customers to browse your offerings.
They can also send you trip requests through the website, and these requests will be automatically stored in your system for easy access.
Additionally, you have the ability to update your website with social media links, display your logo, and choose your branding colors, ensuring the site reflects your business identity.
All trip packages on the website are also trip templates that you can copy and reuse. This means you don’t have to start from scratch when creating a new trip—saving you time and effort.
Furthermore, the integrated contact feature acts as a CRM, allowing you to access detailed customer trip history and manage relationships efficiently. See the example of TripMatrix’s website below.
Website example
Want to Start Using a Travel Itinerary Builder?
TripMatrix is an intuitive travel itinerary builder solution.
It’s easy to use and it’s tailored to travel agent’s needs.
Whether you’re organizing group, business, or seasonal trips for your clients, TripMatrix is a powerful tool for simplifying your operations.
With its flexible payment options, you can choose a 2% commission-based or a custom pricing plan.
Ready to organize trips with TripMatrix?
Reach out to book a demo, contact us for more information, or explore our pricing plans.
Interested to see how
TripMatrix can supercharge your
travel business?
Request a Demo
Published on: August 26, 2024